Nothing makes a house fill up with a sense of warmth and comfort like hardwood flooring.
A clean hardwood flooring can spruce up even the most mundane of rooms. And to achieve that, there is no option more convenient than fitting engineered wood flooring on concrete.
Engineered hardwood gives you durable and moderately humidity-resistant flooring.
Although the process is pretty simple, gluing down engineered wood flooring can get messy and complicated if you don’t know what you are doing. So, in this article, we will discuss how to install glue down engineered wood flooring on concrete.
Let’s begin.
Steps to Install Glue Down Engineered Wood Flooring On Concrete
To get started with flooring, you will need the following items.
- Hardwood Adhesive
- Cord Drill
- Humidity Test Kit
- Flooring Trowel
- Hammer
- Knee-pads
Once you have these tools ready, you’re prepared to start with the step-by-step process.
Step 1. Testing the relative humidity of the concrete
While engineered hardwood has some protection against moisture and humidity, in environments with more humidity than the hardwood can tolerate, it will get damaged. To make sure such a scenario doesn’t happen, you need to test the relative humidity before gluing down the hardwood floor on concrete.
Using your drill, make a hole in the floor that’s 40% of the total depth of your concrete floor. Press your test kit’s sensor in the hole, and get a temperature and relative humidity reading using the reading kit on the sensor. The ideal ranges are 60-80 Fahrenheit and 30-50 percent relative humidity.
Step 2. Prepare the concrete
Make any leveling adjustments or repair any cracks or seams on the concrete. You have to make sure the floor is as flat as possible for the hardwood to fit correctly. And properly clean off all the dust. Then wipe it clean and let the concrete dry out overnight.
Step 3. Condition the flooring material
Let the engineered hardwood flooring rest in the room to make them accustomed to the environment. This step will ensure there won’t be any unusual shrinking or stretching of the material after gluing the flooring down.
Step 4. Plan the layout before starting
Take measurements of the room and the size of your engineered hardwood flooring material. With the measurements, you will be able to pre-determine how many planks you can fit and what alignment they’ll look good in.
Then formulate a layout plan on paper so that you don’t have to adjust mid-work and cut out small odd pieces to fill in corners.
Step 5. Apply adhesive on the floor
Acrylic or urethane-based adhesives are considered the best glue for engineered wood flooring on concrete.
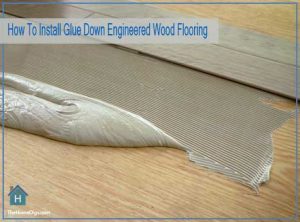
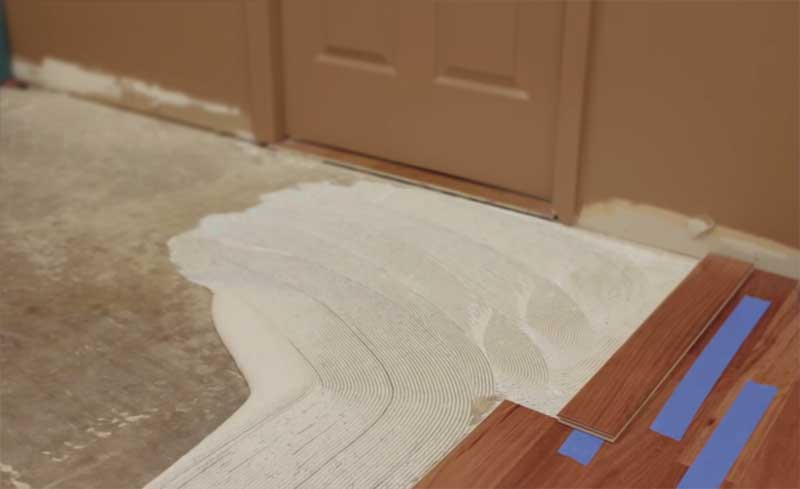
A flooring trowel or a flooring adhesive spreader is very important for this step. It allows you to smoothly and evenly apply the adhesive on the floor. The notches make sure that the glue doesn’t get squeezed around.
You will have to work fast with the glue and apply it on a small portion of the floor and put your material down before the glue can dry up. Make sure not to press a lot of glue into the corners as that will create spillage when you put down flooring.
Step 6. Apply the flooring material
After applying the adhesive, you will need to lock your flooring planks in place. You can start working from a corner of the room and maintain a narrow line, so you have space to apply pressure as you fit them in place.
The engineered hardwood has a built-in groove joint that locks into place, so there should be no gaps or leaks. You can place one plank next to a fitter plank and gently slide it in the grooves.
Once it’s locked in, apply pressure with your hands. You can use a flooring plank tapping block for this too. This step will require you to be on your knees a lot so, have the knee pads ready.
Step 7. Apply weight on the hardwood flooring
Once you’ve fitted the entire floor, you’ll need to apply additional pressure for the flooring to set completely. You can do this by using a weighted roller on the floor. 100lbs is the recommended weight for this.
Step 8. Drying and finishing
Let the hardwood flooring dry for at least 24 hours. After the glue has completely set, you can get to staining and polishing your floor. You can also use pre-finished engineered hardwood flooring to skip any hassle with staining and finishing.
You should watch the video below for the best visual guide by City Floor Supply.
Frequently Asked Questions
# Is it better to glue or float an engineered wood floor?
Both methods come with some benefits and disadvantages. Gluing gives you a more durable finish, but it can be challenging to carry out. Floating makes the process easier, but the end result is less durable to weight, making it unusable for kitchens, bathrooms, or basements. Ultimately, it depends on your specific needs.
# How much does it cost to install glue down engineered wood flooring on concrete?
It’s a complicated question with a broad range for an answer. Eventually, the cost will depend on the material you use, your floor space, where you live, and factors like that. However, a national average cost of $4500 can be estimated, with the lower end being around $2500 and the higher-end around $7000.
# Do you need to seal engineered wood flooring?
Engineered hardwood flooring is most likely to be pre-finished. If the material you are using isn’t, then you certainly should apply sealing. It is still a good idea to seal even if the material is pre-finished. The sealing will give the floor an extra layer of protection and make it more resistant to moisture and humidity.

Conclusion
Hopefully, this guide was able to give you a good idea about how to install glue down engineered wood flooring on concrete. We also recommend that you read the instructions provided with your flooring material and adhesive carefully so you can avoid any unnecessary complications.
This is Autem Decker. Main Author of ‘TheHomeDigs‘. You may not find her on the list of top 10 contemporary Canadian interior designers, but everyone who knows her says she was born to be an interior designer.
She makes her plan in her head and draws them in her years-old diary with a note in the corner. The way she plays with color and shape amazes us.
Connect Her On – Twitter