Hardwood floors are just not a thing you can get install and forget about. This needs your occasional maintenance, care, and attention. There can be damage, holes, scratches, and many things that you get to meet with a hardwood floor at home. And for different types of concerns, you’ll need to reflect diversely.
In most cases, holes and cracks are easy to hide than fix with fillers. But sometimes, the severity of this damage is to the point that you are almost bound to think about filling holes rather than covering them up with wood stain or clear finish.
And for that, there are several types of wood fillers available from latex wood floor filler to epoxy fillers. The money-saving route is making wood fillers yourself. And we are going to talk about that part, how to make wood filler for hardwood floors all by yourself.
How to Make Wood Filler with Sawdust for Hardwood Floors
Creating homemade wood fillers very usually includes this one material. SAWDUST! Yes, this stuff works excellently for working as a wood filler along with other materials. Here are some of the most common wood filler DIYs using sawdust.
One Type of Sawdust Grinded Well
When you have sawdust leftover from a sanding job, save it as a raw ingredient for future wood filler activities. These are more durable than the wood in some cases. Once you are done with some sanding task, gather all the sawdust and store it inside a paper cup or jar. Especially when you are sanding some sort of exotic wood type.
You can also focus on the sawdust that got piled up below your table saw. However, these are usually a bit too coarse for working as a filler. Simply use a coffee grinder to grind these and get rid of the coarseness. If you are looking for a color matching outcome, stay away from mixing different sawdust types together. You need to store them separately instead.
Sawdust-Glue Mixture

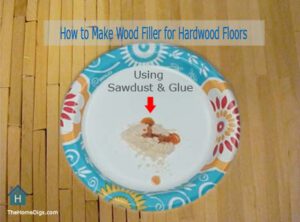
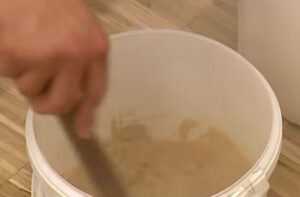
The most common homemade wood filler for hardwood floors is sawdust mixed with glue. The latter ingredient will work as a holding agent to keep things together. If you are thinking about mixing a carpenter’s glue, then there’s one thing to know beforehand. Usually, this product is water-soluble. And so, this has a color of its own.
For this reason, the filler may catch a dull yellow or unattractive grayish tinge that you would mind. If you want to match the wood species color for filling holes, then mixing sawdust of that particular wood type becomes somewhat important. You can’t use just any glue or else there’s a chance of discoloration.
It’s best to skip the carpenter’s or PVA glue and go for clear epoxy glue instead. In situations where one needs to mold the filler around a wooden piece’s edge, this work even better. This will also work for flat wood to fill cracks and gouges that you want to clear coat. Wood flour cement can work well here as well.
However, you need to know the right way on how to use wood filler on hardwood floors. Usually, the wood or epoxy glue used fillers will only lend you a few minutes until it hardens. So, knowing the right technique and having the correct idea is important.
Using Lacquer for Filler
Another amazing DIY wood filler for hardwood floor that you can make with sawdust is the lacquer-based filler. This needs nitrocellulose lacquer along with sawdust. Usually for a more resilient and durable result, one can opt for making this type of wood filler.
The lacquer sawdust filler can be used for small filling needs. Of course, you’ll use ground sawdust for this. And a very tiny amount of lacquer will be necessary to make this. Mix these two things together in a bowl to make your filler.
The lacquer is also well known for preserving sawdust color pretty nicely. It also enables easy sanding option than glue. You can expect this filler to dry very quickly, even faster than wood glue. However, you can soften it again if necessary, by simply adding more lacquer.
How to Make Wood Filler Without Sawdust for Hardwood Floors
Now, you may be one of those who can’t have access to sawdust. So, you want some ideas on making flexible wood filler for floors without the sawdust. Well, it’s possible.
You can use limestone, calcium carbonate, and mix these with linseed oil. This economical filler will work best for filling cracks and gouges on the floor before a painting session. And if you pay attention, then you’ll notice that most painter’s putty actually uses these three ingredients.
You need to start with the oil and pour it into a bowl first. Then include the limestone and calcium carbonate incrementally. You want equal parts of both here. Keep on stirring while you add these stuffs.
Once you achieve a putty-like consistency, conclude that the filler is ready. If you want a DIY stainable wood filler here, then simply add a matching colorant. And here you have a flexible filler that will be waterproof and remain same even with the wood changing its conditions.
Conclusion
The main problem with most store-bought fillers is that these have a tendency of sticking out like a sore thumb. Especially when it is stained. And that can ruin the appearance of your hardwood floor.
With passing time, you’ll notice that the wood is darkening. But the filler is not adapting or taking this stain. This creates a horrible imbalance. And so, trying DIY wood fillers can be a better option for filling holes, cracks.
Now you know quite a few recipes on how to make wood filler for hardwood floors. Try it for yourself following right process and hopefully, the results will be satisfying. On That Note, Signing Out for Today!
This is Autem Decker. Main Author of ‘TheHomeDigs‘. You may not find her on the list of top 10 contemporary Canadian interior designers, but everyone who knows her says she was born to be an interior designer.
She makes her plan in her head and draws them in her years-old diary with a note in the corner. The way she plays with color and shape amazes us.
Connect Her On – Twitter